MXNet Control4: Initial Driver Setup - On-Site Installation
The following guide can be used to configure the MXNet driver within Control4.
This guide requires the use of our MXNet driver version 12 or greater. You can find the latest version of the driver here.
This guide is intended for an MXNet installation that is already setup and installed within an installation.
Here is the system diagram for our basic example:
Let’s start by connecting the driver to MXNet and discover the connected encoders and decoders. With this setup method existing custom names will be overridden.
1. First setup the MXNet system and verify system functionality via “Mentor”, the MXNet web interface. For help with this see the MXNet Quick Start Guide.
IMPORTANT NOTE: Using Mentor check the firmware version in "Home System Utilities" and check here to download the latest firmware files and see the Release Notes.
2. Add the MXNet driver to your Control4 project. Select the driver configuration that meets your maximum encoder or decoder quantities. For our example project we will use the 8x8 version of the driver since we do not have more than 8 inputs or outputs.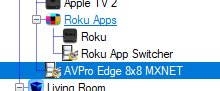 3. Navigate to Connections, the Network tab, and finally IP Network.
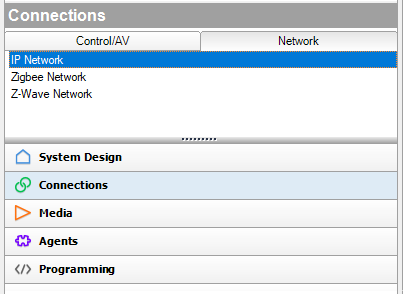 4. Select the MXNet device and input the IP address to connect the driver to MXNet.
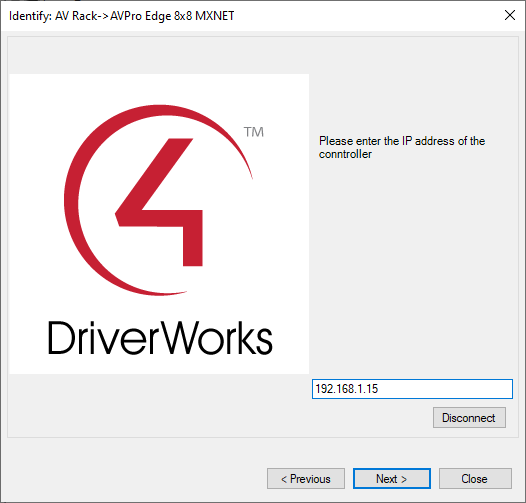
NOTE: The status indicator will change from Red (Not Addressed) to Green (Online) when driver connects to the device. If this does not change to Green (Online) please verify the CBOX IP address and your local network configuration and try again. 5. Navigate back to the System Design and select the MXNet driver in the device tree.
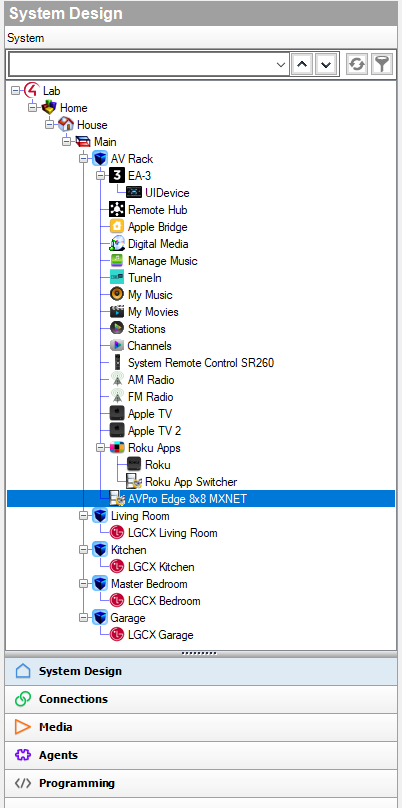 6. Select the “Actions” tab and click “Config: Auto-Configure Aliases.” Enter 1234 and click OK to configure the aliases.
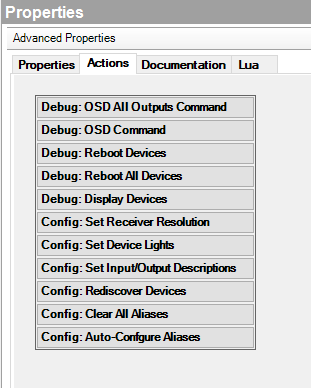 7. Return to the “Properties” tab8. You should see a Status of Operational. If there were any issues you will see information here. If it says alias names misconfigured, repeat step 6.
Confirm the fields under “Transmitter / Receiver Device Selection” are populated with the MAC addresses of all discovered transmitters and receivers connected to your MXNET switch.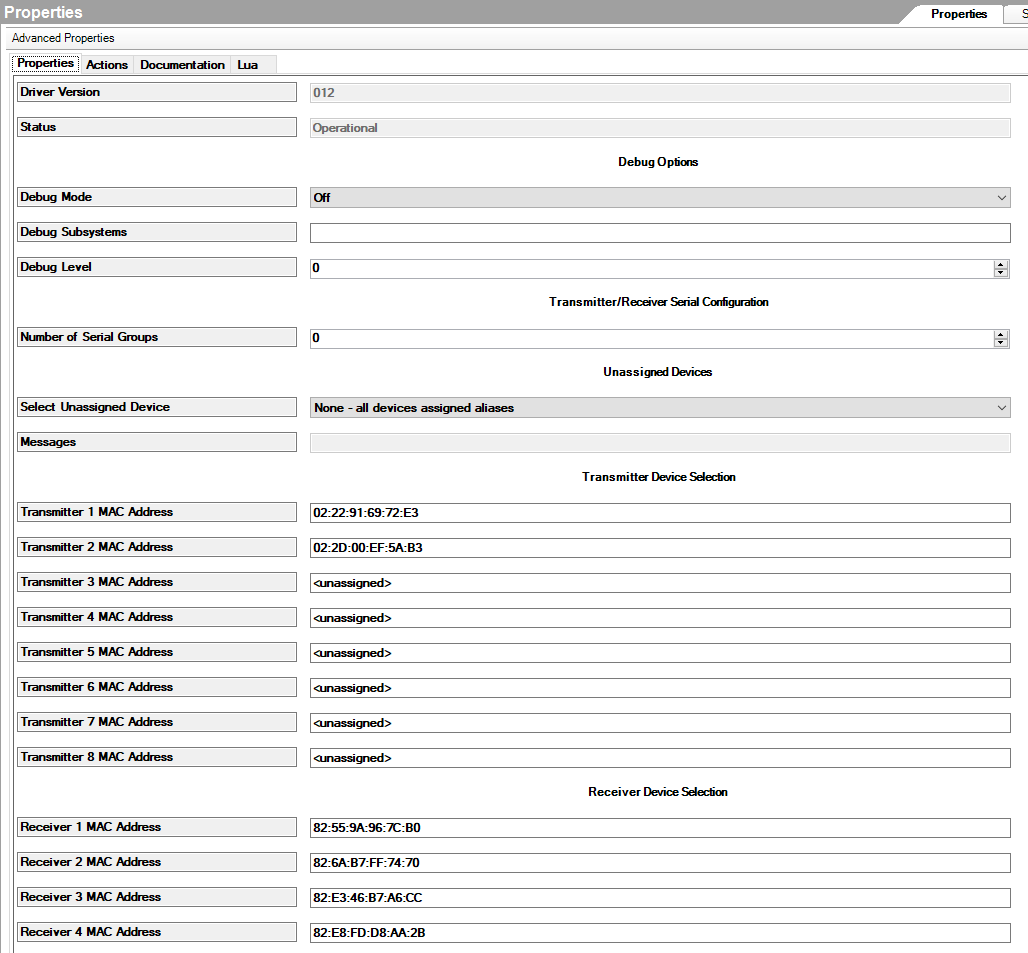
NOTE: Any encoders and decoders that are offline will not appear. If you install or replace additional encoders or decoders you will need to add and bind them in Control4 at the time of installation.
Now that the Control4 MXNet device discovery is completed, we need to determine which encoder or decoder is connected to each source or sink device. The following steps will help make this process simple.
9. Using a web browser (suggested web browsers are Firefox and Google Chrome), navigate to the IP address of the MXNet CBOX to load the “Mentor” web interface for MXNet.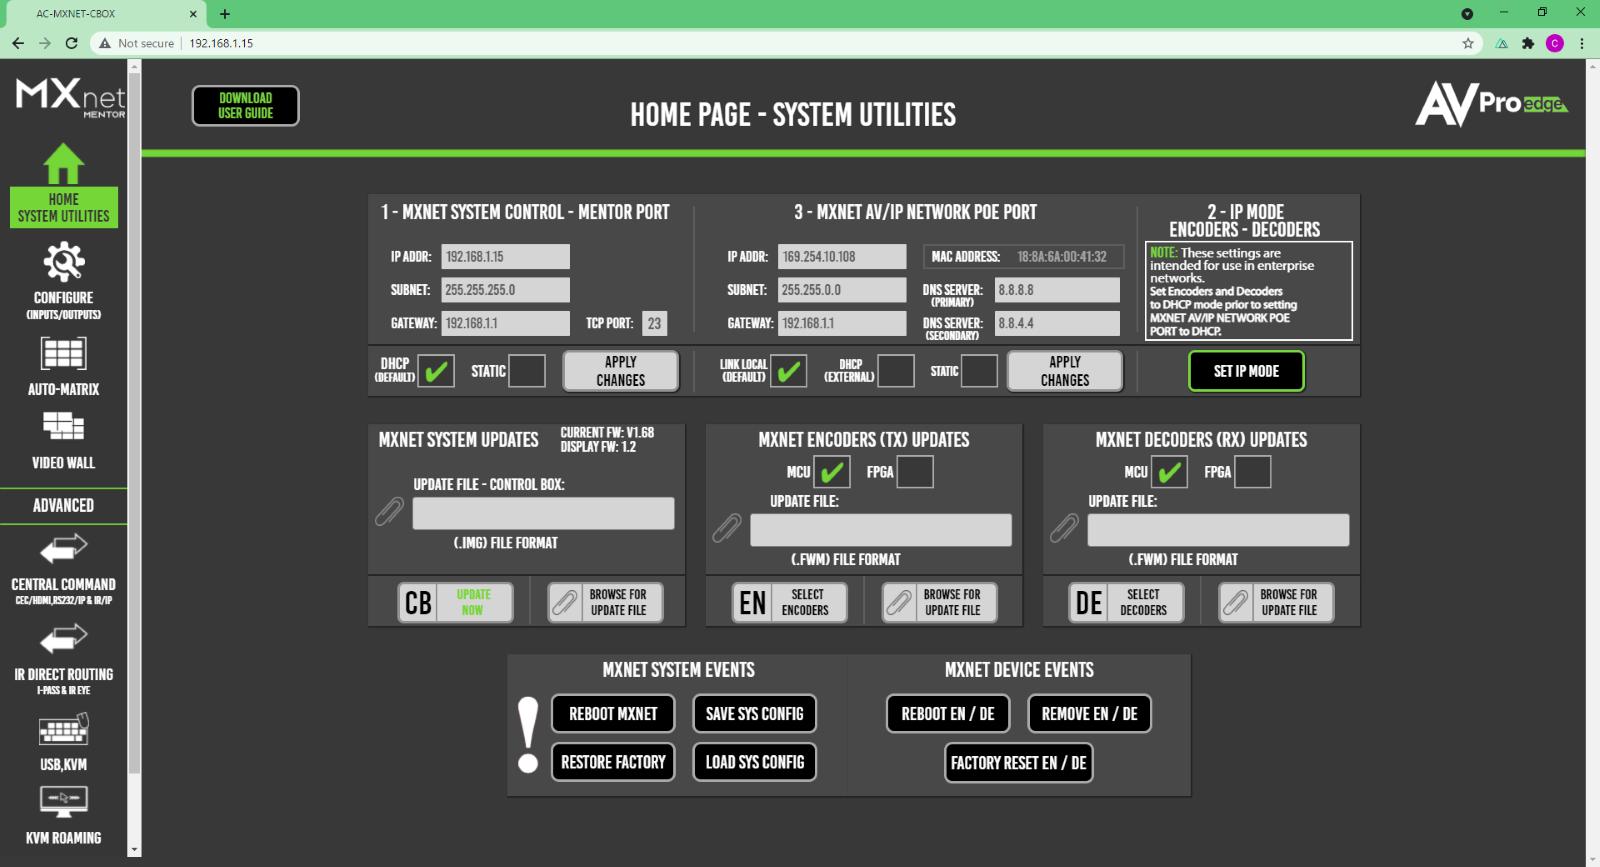 10. On the left side of the web page, select “Configure (INPUTS/OUTPUTS)”
 11. Select the OUTPUTS/DECODERS/DISPLAYS tab on the top of the configuration page.
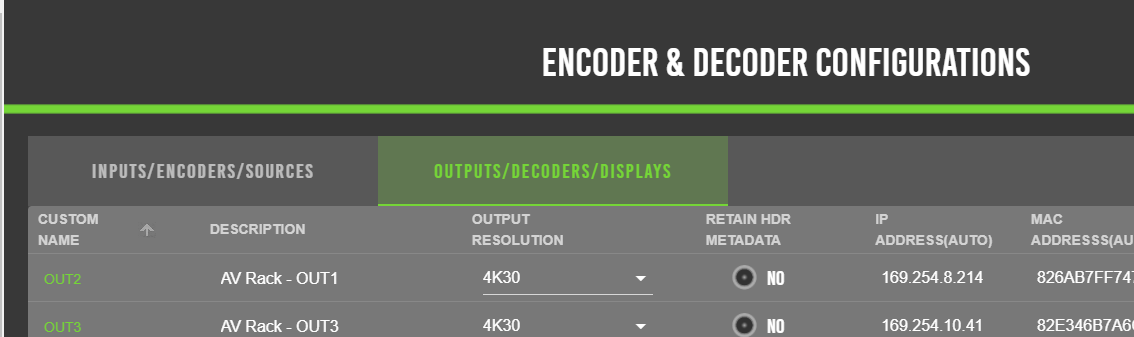 12. On the output configuration page enable the OSD for all displays. This will show the decoder information on the video output including the custom device name, mac address, and IP address (on the AV LAN).
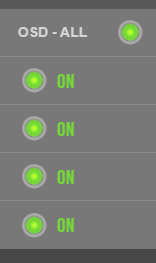 13. Turn on all sink devices and displays. Take notes of each display/sink device location and the decoder connected to the sink device.
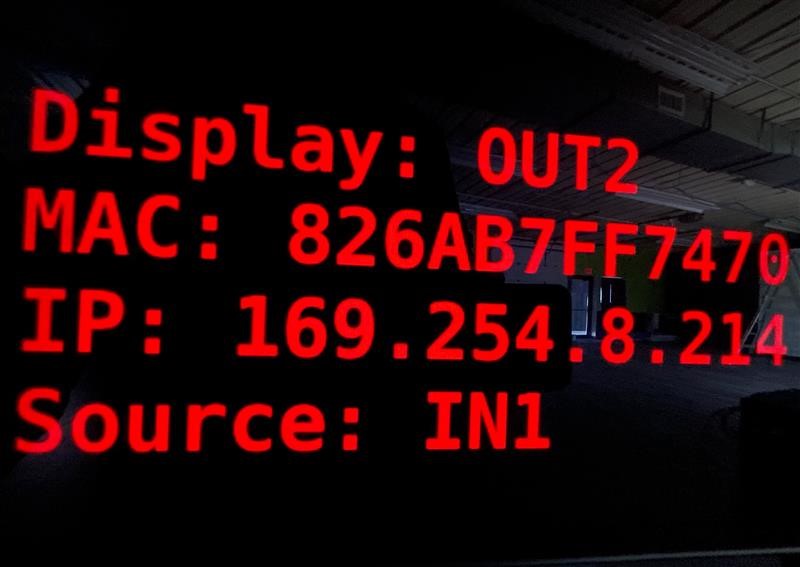
14. Go to the encoders that are connected to the source devices and create a similar list of connections. You can utilize the small OLED display on each of the encoders to see the device names.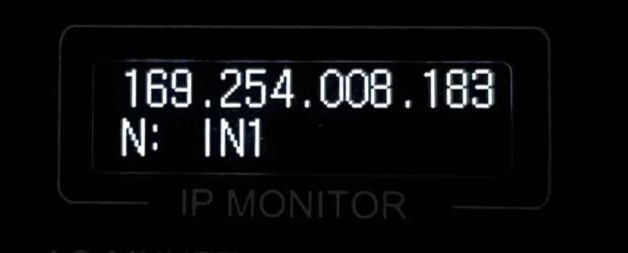
Now that we have the list of which encoder or decoder is connected to each source or sink device, we can create the video bindings in Composer to complete the driver installation.
15. Navigate to Connections and ensure you are on the Control/AV tab.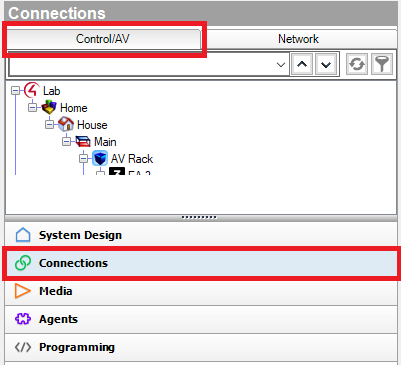 16.Select the MXNet driver in the device tree.17.Using the lists created in steps 9-14, create your AV bindings
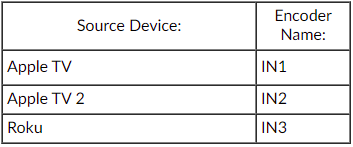
Note the IN and OUT assigned alias number must match your input and output binding number. See bindings here and compare to previous device lists/tables for example: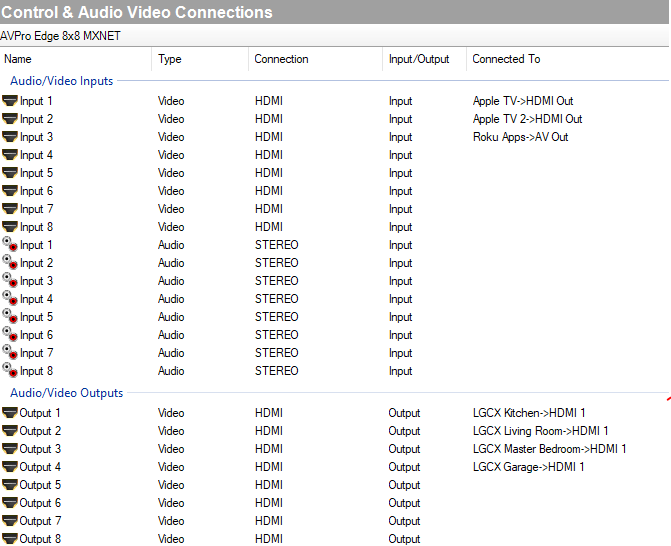
18. Setup is complete. You can test the matrix abilities of the MXNet driver configuration by double clicking the MXNet driver in the device tree. It will show you the test matrix page in Composer where you can change the video selection for each output and verify functionality.
Now that you have the Control4 driver for MXNet installed and configured you can rely on Control4 to perform your video switching as needed or use programming commands to manually trigger video switching.
Related Articles
MXNet Control4: Initial Driver Setup - Janus - Off-Site Pre-Commission
The following guide can be used to configure the MXNet driver within Control4. This guide requires the use of our MXNet driver version 12 or greater. You can find the latest version of the driver here. This guide is intended for an MXNet installation ...MXNet Control4: Videowall Setup Guide
The following guide can be used to configure the MXNet driver within Control4. This guide requires the use of our MXNet driver version 12 or greater. You can find the latest version of the driver here. This guide is intended for an MXNet installation ...MXNet Control4: Incorrect Encoder/Decoder Assignment Correction
If one or more encoder(s) or decoder(s) were installed in the incorrect locations, and the video switching events are switching the incorrect output, the encoder(s)/decoder(s) need to be swapped in the Control4 driver. This guide will show you the ...[AMX] MXnet Control Driver
Link to driver: AMX Developer Site [External] Control System: AMX Version: [See external site] Release Date: [See external site] Supported Products: AC-MXNET (CBOX) 1G Changelog: - Initial releaseHow To: Controlling MXNet with Control4
MXNet is designed to work with control systems such as Control4. Take a look at what you can do with Control4 to connect and control the MXNet Ecosystem. For detailed Control4 driver configuration steps please see our Off-Site Pre-Commission ...